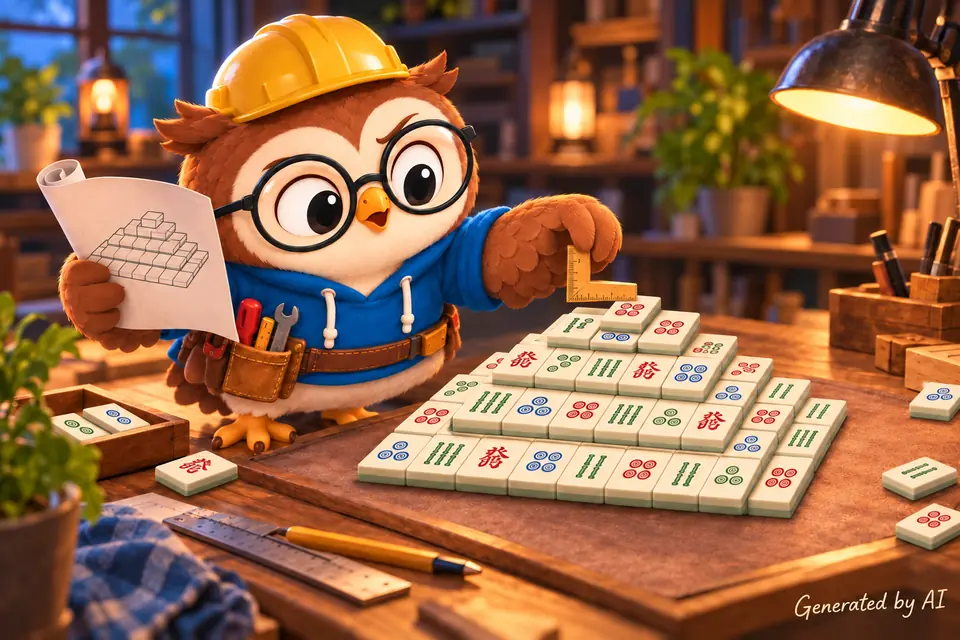
Last time, we made some shiny new Mahjong tiles. We gave them some style, made them look nice, and even figured out how to slap a drawing on top. If you missed that, or just want to relive the magic, you can check out the “Creating empty Mahjong tiles with CSS and SVG” tutorial. This time, we’re diving into the board layout itself.
When we play a game with levels, each level has its own design, a map of how it is presented. Some of the levels add features like obstacles and new objectives. Some games randomly generate the board, while others keep the level the same every time. One thing I love about Mahjong is the randomness. We are going to build layouts that can be reused or used to create interesting levels, but the tiles on the layout will be placed randomly.
Right now, the drawings on the tiles still don’t matter much. It can be nice to see them. However, we’re only creating the board. The next tutorial in this series will cover the game itself, including tiles with drawings. But look at me, getting a bit ahead of myself.
So what’s in a layout?
The layout we’re building determines where all the tiles go and how they stack. Different versions of Mahjong have their own rules, but ours are pretty simple. No need to memorize a rulebook just yet.
- We have 144 tiles.
- Tiles can be placed on and next to each other.
- A tile can be blocked from removal.
- The player can choose the layout.
Since we’re starting with a basic Mahjong game, the layout won’t have any wild surprises (yet). We’re keeping it simple. Simple doesn’t always mean efficient, but it does mean it’s easier to wrap your head around and much quicker to set up. For this, we’ll use a trusty JSON file to hold our layout.
Why JSON?
JSON (that’s JavaScript Object Notation, if you want to sound fancy) is basically text that both humans and computers can read without getting a headache. It tells you what’s what and what’s inside.
Even though it’s got JavaScript in the name, you can use it with pretty much any language. It’s everywhere, it’s simple, and it’s quick. Bonus points: it compresses well, so your web server can shrink it down for you, and the browser knows how to puff it back up. No extra code needed.
We’ll use two languages for the game layout: PHP on the server side, and JavaScript in the browser. Both of them speak JSON fluently, which makes our lives a lot easier. We just need to decide what our configuration should look like.
The layout configuration
Let’s go over what the layout file looks like:
{
 "label": "My 'Hello Player' Layout",
 "layers": [
  [
   "#.#.#.",
   "......",
   "#.#.#."
  ],
  [
   "......",
   ".#....",
   "......"
  ]
 ]
}
We’re just covering the basics here, so this isn’t the full file—just a sneak peek at what’s inside. We’ll get to the whole thing soon.
What we have here is quite simple. In our board requirements, we said that the player can choose a layout. That’s why we have the label property. We also mentioned that tiles can be placed on top of each other. This means we need to introduce layers. Layouts are “just like onions; they have layers”.
Think of it like building with blocks: you start with the bottom layer and stack upwards. Same idea here. We’ve got an array of layers, each with rows, and each row with columns. Each column knows if it’s got a tile or not, and we use symbols to show that.
The file is laid out so you can see the structure at a glance. Each layer is a grid of rows and columns, easy to spot and understand.
As mentioned, we have our symbols representing the state of each cell in the layer grid:
#– We have a tile.– Nothing here
One thing to watch out for: a tile can sit halfway over two tiles, or even four if you get fancy with the stacking. That means sometimes a tile is only a quarter on each tile below it. Mahjong tiles are surprisingly acrobatic.
To make this work, each row or column is half a tile. So on the board, the first row of the first layer shows tiles side by side. In the grid, it looks like #.#. If you see ##, that’s not allowed. Also, the example above isn’t a valid layout yet—it doesn’t have 144 tiles. A valid setup needs 144 # symbols, each separated by at least one dot.
If we’re talking about invalid configurations, we should also mention the vertical cases: a layer can’t have a situation where two rows are directly above each other with a tile placed in the same column, like:
{
  layers: [
    [
       "#.#.#.",
       "#....."
    ]
  ]
}
Instead, it should be:
{
  layers: [
    [
       "#.#.#.",
       "......",
       "#....."
    ]
  ]
}
Layout limitations
Before we jump in, let’s think about how many tiles we can fit in a row and how many rows we get. Basically, we need to figure out our grid size. The number of columns and rows depends on the viewport size—unless you’re a fan of scrollbars.
If you’re picturing the classic Mahjong solitaire board (the turtle), we need at least 12 tiles per row and 8 rows. But wait, that doesn’t mean our grid is just 12 by 8. Each tile actually needs two rows and two columns to fit, so our grid needs to be at least 24 columns by 16 rows. Each cell is half a tile’s width and half its height.
Normally, we work in rem, but for these calculations, pixels are just easier. Screen resolutions and browser viewports love pixels. When it’s time actually to code the game, we’ll switch back to rem. But look at me, getting side-tracked yet again…
The tile we previously designed in the Creating Empty Mahjong Tiles with CSS and SVG tutorial is based on 56×72 pixels. The tile also has depth effects that add a few pixels, depending on whether it’s displayed at full size or has other tiles touching it and hiding the depth effect.
Board size
To display the turtle layout without scrollbars, the board container must be at least 56px x 15 = 840px wide. And since the depth is about 8px, and at most half the tiles in a row can show their depth, that is another 8px x 8 = 64px. That leads to about a required width of 904px. Given the modern viewport width, I think we can allow a few extra tiles for some breathing room. Let’s see how it does with 18 tiles in a row. Calculating it the same way, we reach 1080px. Still doable.
Each tile is 72px tall, and we need at least 8 rows for the turtle, plus 8px for depth. That gives us a starting height of 608px. So with 1080px wide and 608px tall, things might get a little snug. Especially if we want to squeeze in some game controls too.
Oh, and we haven’t even added layers into the mix yet…
Adding layers
Our tiles have a bit of visual depth, so we need to keep that in mind when stacking them. If you put a card right on top of another, you won’t see what’s underneath—at least, not until the pile gets tall enough to peek out. Luckily, our tiles already have a depth effect, so they’re a little easier to spot.
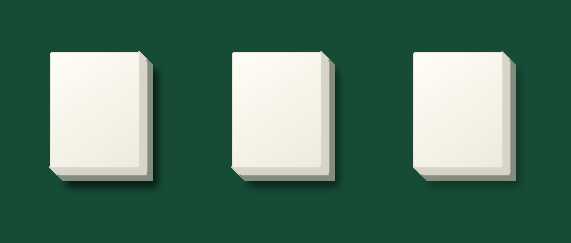
Without factoring in the layers, it’s almost impossible to tell how many tiles are stacked in one spot just by looking. But if we add a little offset to each new layer, the depth effect pops right back and everything looks much clearer.
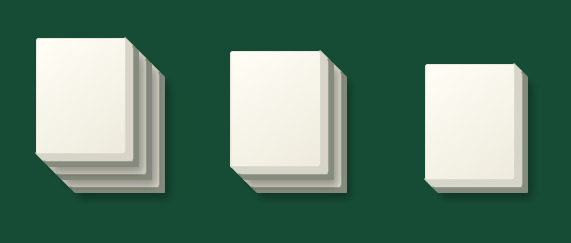
So, to keep our math honest, here’s what we need to consider:
- Tile size
- Tile depth size
- The number of Layers.
Creating the layout file
When we program, we often need tools to help us build our project. For example, a small app to visually help us build and share layouts. That’s a bit outside the scope of this tutorial, though. If you want to see one, let me know in the comments!
Our layout file is just plain, readable text. We’ll start by making a simple JSON file by hand.
Planning the shape
First up: picking a shape. The classic Mahjong board is a bit boring, and since this site has a soft spot for owls, let’s make an owl-shaped layout. To keep things simple, we’ll just do the head—specifically, the WDP owl’s head.

Now that we’ve picked our shape, let’s set up the label in our configuration:
{
 "label": "Owl Head",
 "layers": [
 ]
}
Let’s call this file owl-head.json. Save it somewhere you won’t forget—you’ll need it for the next tutorial when we actually build the game.
As you can see, layers is an empty array for now. Let’s add the layers.
Shape into layers
Our board grid is 18 columns by 8 rows. I’m going to drop the owl image into a spreadsheet with high opacity to help map out the base layer. You can use whatever method works for you—as long as you can add a grid and type, you’re good to go.
In my spreadsheet, I set it up for 18 columns at `56px` wide and 8 rows at `72px`, just like our tiles. Then I plopped the image in the center and resized it to fit inside the grid.
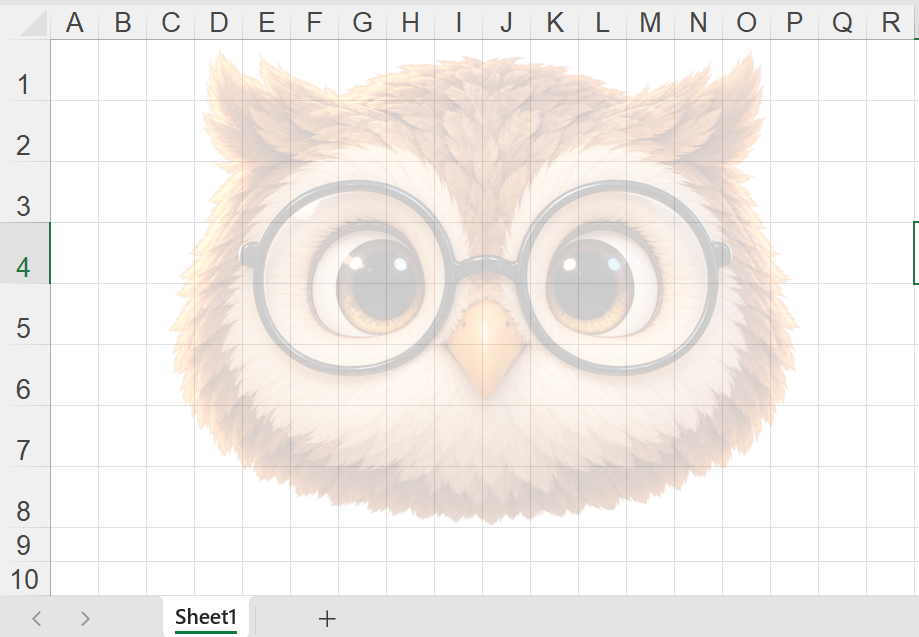
The base layer (layers[0]) is the biggest one, since you can’t put tiles outside it. Tiles can’t just float in midair—they need full tiles underneath to balance. Once I mark out this layer, the rest is a breeze.
I went ahead and roughly traced the image outline by coloring the cells along the edge. Makes it much easier to see what’s going on.
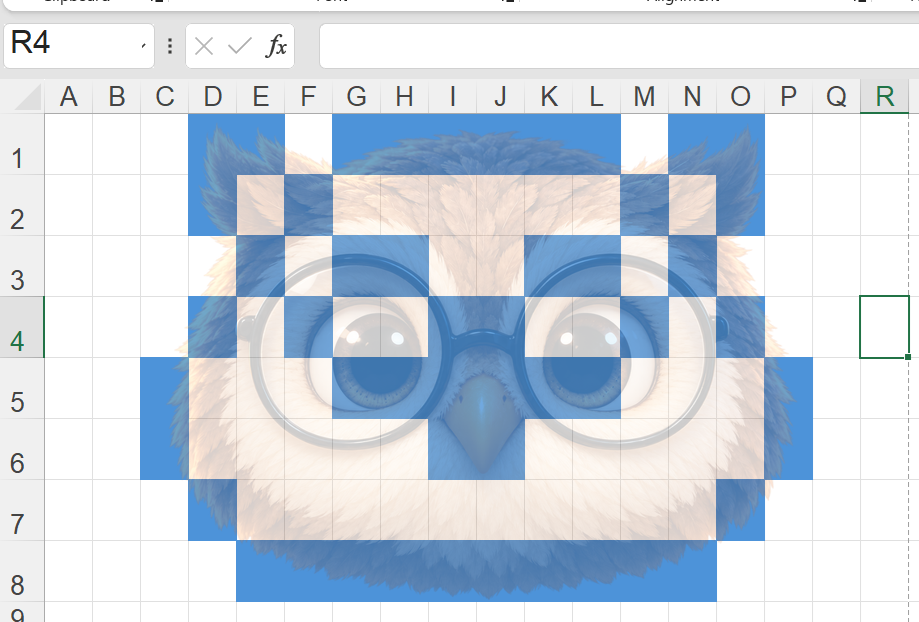
I also used this as a chance to figure out which parts should go up to the next layer.
Since each tile needs two cells, I used “#.” and “..” to mark where the tiles go. This doesn’t give me the empty rows yet, but it fills out the columns. I can add the empty rows later. I filled in all the cells in my grid.
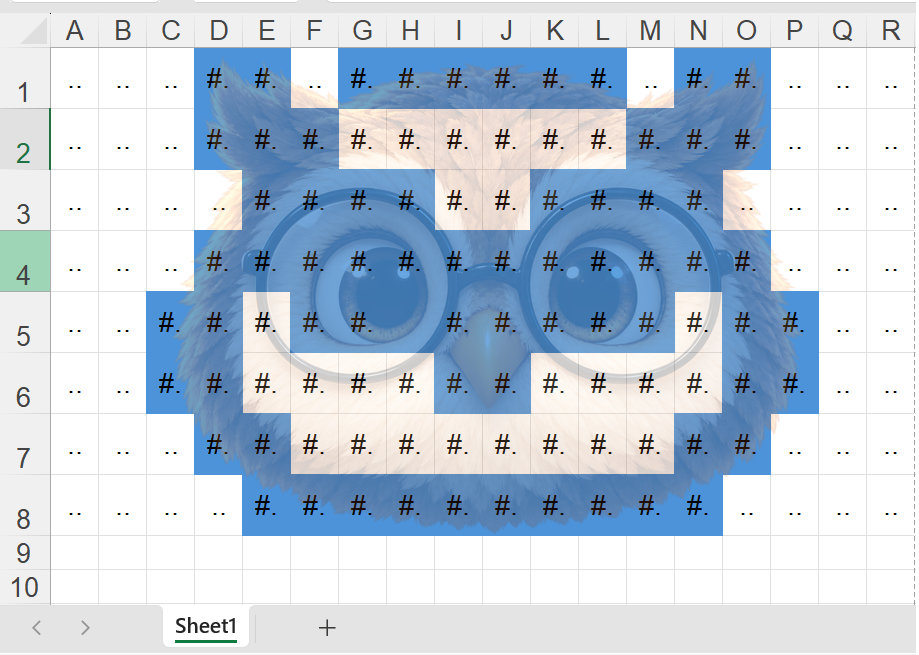
Now I’ve got all the symbols in place, but the image and some blue cells are still hanging around. I cleared those out, leaving a nice, clean map of the layer.
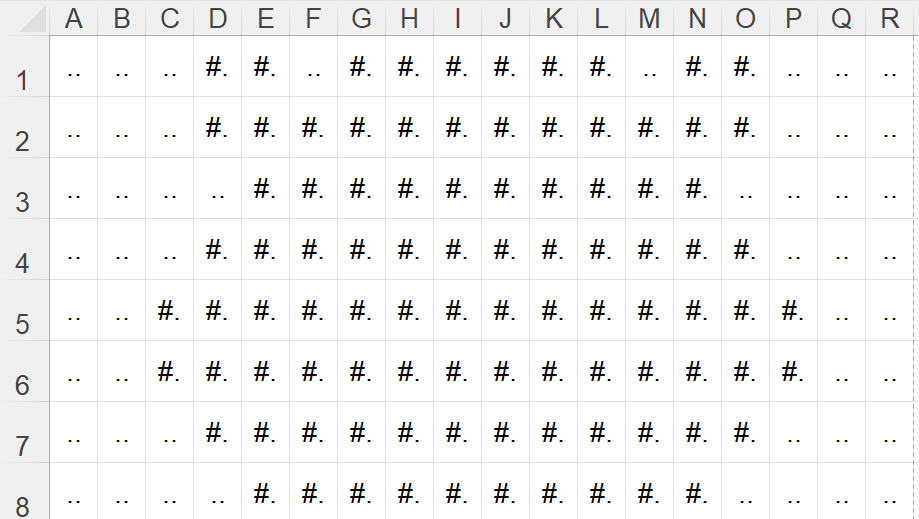
Now I can just copy and paste the grid cells into a text file and format them.
- Remove all the whitespace
- Add a comma at the end of the row
- Add an extra row under every row with all the cells marked as empty. Basically, a row with the same number of characters as the one above it.
To save some time, you can do the formatting part with a small JavaScript snippet that you can run in your browser’s developer tools:
const input = `
.. .. .. #. #. .. #. #.
.. .. .. #. #. #. #. #.
`; // Replace with your copied string

const output = input
 .trim()
 .split(/\r?\n/)
 .filter((line) => line.trim() !== '')
 .flatMap((line) => {
  const row = line.replace(/\s/g, '');
  const emptyRow = '.'.repeat(row.length);

  return [`"${row}"`, `"${emptyRow}"`];
 })
 .join(',\n');

console.log(output);
This will give you the string to use as your layer value. Once you’ve got the base layer, it’s pretty easy to add the next layers. You can use your spreadsheet or add them manually in the file—it’s easy to see what’s going on.
I played around with the layer a bit and made a layout file from our base. Here’s the full file with all the layers:
{
 "label": "Owl Head",
 "layers": [
  [
   "......#.#...#.#.#.#.#.#...#.#.....",
   "..................................",
   "......#.#.#.#.#.#.#.#.#.#.#.#.....",
   "..................................",
   "........#.#.#.#.#.#.#.#.#.#.......",
   "..................................",
   "......#.#.#.#.#.#.#.#.#.#.#.#.....",
   "..................................",
   "....#.#.#.#.#.#.#.#.#.#.#.#.#.#...",
   "..................................",
   "....#.#.#.#.#.#.#.#.#.#.#.#.#.#...",
   "..................................",
   "......#.#.#.#.#.#.#.#.#.#.#.#.....",
   "..................................",
   "........#.#.#.#.#.#.#.#.#.#.......",
   ".................................."
  ],
  [
   "......#.#.................#.#.....",
   "..................................",
   "......#.#.#.............#.#.#.....",
   "............#.........#...........",
   "..........#...#.....#...#.........",
   "........#...#...#.#...#...#.......",
   "..........#...#.....#...#.........",
   "........#...#.........#...#.......",
   "..........#......#......#.........",
   "..................................",
   "................#.#...............",
   "..................................",
   ".................#................",
   "..................................",
   "..................................",
   ".................................."
  ],
  [
   "..................................",
   "..................................",
   "..........#.............#.........",
   "............#.........#...........",
   "..............#.....#.............",
   "..................................",
   "..........#.............#.........",
   "..................................",
   ".................#................",
   "..................................",
   "................#.#...............",
   "..................................",
   ".................#................",
   "..................................",
   "..................................",
   ".................................."
  ],
  [
   "..................................",
   "..................................",
   "..................................",
   "..................................",
   "..................................",
   "..................................",
   "..................................",
   "..................................",
   "..................................",
   "..................................",
   "................#.#...............",
   "..................................",
   "..................................",
   "..................................",
   "..................................",
   ".................................."
  ]
 ]
}
For the grand finale, I’ll load it into the game so we can see how the shape turned out.
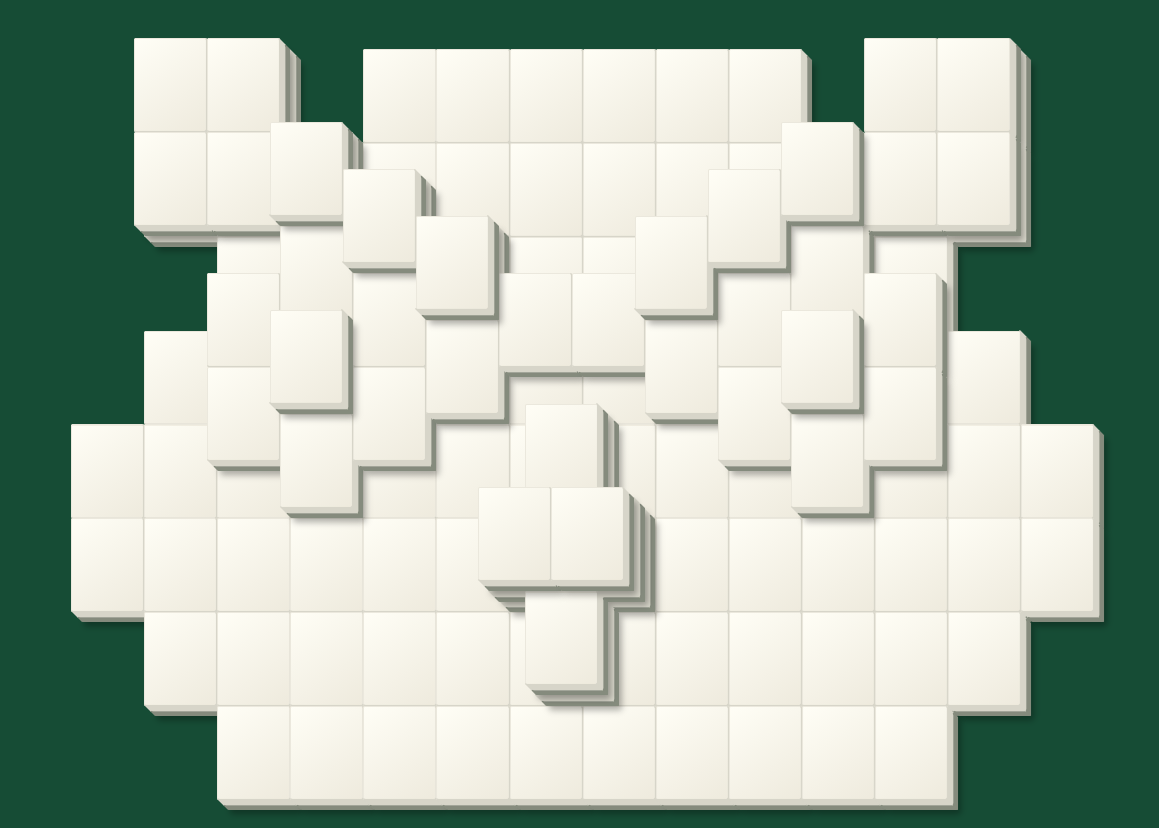
Yes, I know, I didn’t include the drawings. Gotta save something for next time… 🙂
Coming soon
Next time, we get to the really fun part: building the JavaScript Mahjong game. We’ll figure out how to make sure the board is solvable, add the rules, and more.