Mahjong Game – The Graphics
The next game we’re going to build is a Mahjong solitaire game. Mahjong is a tile matching game which I feel is a natural step forward from the Memory game we created in the previous post, so if you haven’t read that post yet, you might want to give it a look.
Since this is a more complicated game, I decided it would be best to tackle it in several posts instead of just one. In this first post we’ll create the graphics needed for the game. Let’s start by considering what this game needs to include. If you search the web for even a few minutes you will find that there are several versions of this game, each with its own set of rules. To make things easier, our own basic version of the game will use simplified versions of some rules, and ignore others (like score) entirely.
So what does that leave us with?
- Multiple sets of tiles:
27 Common tiles, consisting of 3 sets of numbered tiles, each set with 1-9 images of the set icon (e.g., flowers, cars). A Common tile must be matched to its exact counterpart (e.g., six of cars matches six of cars)4 Picture tiles. Picture tiles have only a single large icon on them, and work the same as Common tiles, in that each tile can only be matched to its exact counterpart (e.g., pink clock matches pink clock)
4 Single tiles. These tiles feature a picture (not an icon) but no numbers, and each tile can be matched to any of the others (e.g., squirrel matches beach)
- With the exception of the Single tiles, there are 2 pairs of each tile (144 tiles total)
- The board can have several different layouts.
- In each turn the player must select two matching tiles, in accordance to the behaviors described above, and the rules described below.
- If the player selects two valid, matching tiles, the tiles are removed from the board.
- The game is won when there are no more tiles on the board.
- The game is lost if there are still tiles on the board, but no more moves are available to the player.
As I said, we are going to start by creating the game’s graphics. Since we have about 35 different tiles with different graphics on them, we will be dealing with a lot of objects, which means we are going to suffer a hit to performance. Therefore, whatever we do next must take performance into account. What does performance have to do with the graphics, you ask? To answer that question, let’s consider how we did things in the Memory game: In that game, we used separate image files for each card. If we did the same here, we would trigger a lot of different network calls, and even if we used caching it would still be slow, because we’d have to move around a whole bunch of different graphic files; unlike the Memory game, where we had relatively few cards, and therefore relatively few graphic files (actually, now that I’ve made that observation, I think I need to go and apply the solution which I’m about to share to the Memory game, too). To work around the performance issue, we could combine all the tiles into one big graphic file, which we could preload if we wanted. If we used caching, the performance would be even better. Because all of our tiles have the same dimensions, I think it would be very easy to use a single file for all of them.
So let’s get to it. Go ahead and open your favorite graphics software; in this example I’ll be using Adobe Fireworks, but I’m pretty sure any program will do. The first thing we need to create is our basic building block: the tile. Since Mahjong boards have layers, we need to make sure our tiles have a 3D look. To do that, we will draw a rectangle with a height of 68 and a width of 50. I chose white as the background color and a shade of gray for the stroke (or borders): #999999. To get the 3D effect, we will need to give this image some depth. We can do this by drawing a 4 pixel diagonal line from the upper right corner to the lower right side with the same color as the stroke. Do the same at both of the bottom corners. The end result will be a rectangle with 3 diagonal lines coming out of its corners:

Draw lines to connect the diagonals and create the 3D rectangle:

We now have 2 big empty spaces created by the lines we added. I filled them up with a lighter shade of gray: #cccccc.
So the final image is:

YAY! We now have a basic empty tile! We can now create a new file with a height of 360 and a size of 486 and fill it with our new tiles (make sure you are accurate in positioning them side-by-side. The end result should look like this:
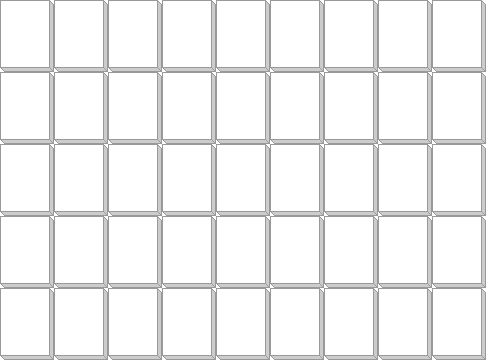
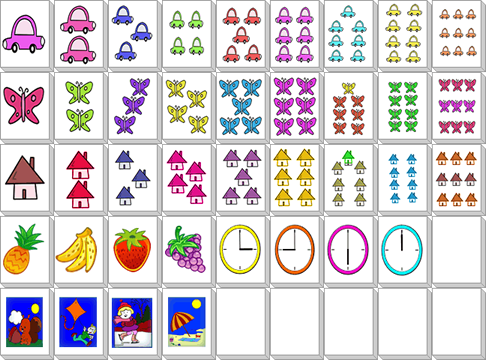
Excellent! We are now ready to fill in the tiles. The structure of this file is as follows: the 3 upper rows contain the Common tiles. The 4th contains two sets of Picture tiles, and the last row contains 4 Single tiles (remember, these tiles will not be duplicated).
For icons you can just use whatever you want. Just make sure you are not violating any copyrights while doing so.
My final image looks like this:
Now we have our tiles image ready. In my next post we will take this file and extract single blocks from it for display. We will also create the logic to duplicate the tiles according to our game guidelines.
Remember: When using a lot of images in one webpage it is wise to reduce network call by having one file that includes all the images when possible (at least when they are for the same purpose and are the same size).
So until next time, have fun
Adi Gabai
Leave a Reply